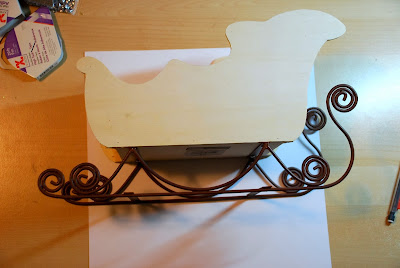
I found this super cute wooden sleigh at Michaels and knew I wanted to decorate it with this gorgeous Heidi Swapp Believe collection.
This is the end result.
First I gathered the papers from the Heidi Swapp Believe collection that I wanted to use.
Then I traced the sleigh onto the back of the patterned paper. It fit perfectly.
After tracing and cutting out all of the pieces I carefully inked all of the edges.
I then spread out all of the pieces and sprayed them with some Heidi Swapp Color Shine. (in Chartreuse)

While waiting for the mist to dry I began by first painting the edges with some green paint.
I then took the paper pieces and ran them through my Xyron 5" Creative Station and the Xyorn 9" Creative Station.
I then adhered them to the wooden sleigh, carefully lining up the edges.
After all the pieces of paper had been adhered I took some Xyron 1/4" Double Sided High Tack Tape and placed it around the bottom edge of the sleigh.
I peeled off the lining of the tape and then adhered the Heidi Swapp Color Magic Trimmings (white canvas flag banner) all the way around the bottom edge of the sleigh. (this canvas banner can be sprayed with mist but I left mine plain).
I adhered some of the Heidi Swapp rubons (from the Believe Memory File Kit) to the sides of the sleigh and added some sequins in the center of the snowflakes.
I adhered down the red banner from the Believe Banner Delights along the back edge of the sleigh and on the front edge as well. I adhered a couple of sequins in the centers.
On the back of sleigh I took a Heidi Swapp Color Magic Tag Pennant and folded it over the back edge of the sled.
On the back of the pennant I attached one of the Color Magic Paper Flowers using Xyron 3/8" High Tack Adhesive Dots. I then adhered a rubon from the Heidi Swapp Believe collection to the lower portion of the pennant.
On the other side of the white pennant I then applied another Heidi Swapp rubon and a label sticker (from the Heidi Swapp Believe Memory File Kit) overtop of the edge.
Here's a side view of the sled.
I'm thinking that I'll keep this on the table in the living room and place the christmas cards from family & friends inside.
Supplies: Xyron (5" Creative Station, 9" Creative Station, 1/4" Double-sided High Tack Tape, 3/8" High Tack Adhesive Dots)
Heidi Swapp Believe Collection (patterned papers, rub-ons and stickers); Color Magic Tag Pennants, Color Magic Trimmings, Color Magic Paper Flowers, Color Shine spray
Thanks for stopping by and I hope you enjoyed my creation today.


LOVELOVELOVELOVELOVE this sled! Great use of the Heidi Swapp Believe collection and Xyron adhesives!!! I can see an Elf on the Shelf sitting in it with lots of little treat boxes! TFS!
ReplyDeleteBTW ~ Would love to know where I can get my hands on one of these sleighs! Thanks in advance!
ReplyDeleteHey Barbara, I found this one at Michaels in the wood craft section. It's quite large so it's definitely great for holding some goodies!
DeleteOh what a wonderful
ReplyDeletesleigh and I love the
idea of using it to hold
cards!
Carla from utah
This is gorgeous!!!
ReplyDelete