I'm thrilled to be taking in part in the Blog Hop with Simple Stories and Perfect Paper Crafting. Today is the last day of the blog hop and I want to thank you for joining me on my blog.
I was thrilled to be able to be given the opportunity to play with this fabulous tool.
I received the Perfect Layers - set of 3 different 'rulers' each with 4 different measurements. The possibilities are endless and definitely make creating mats so easy!
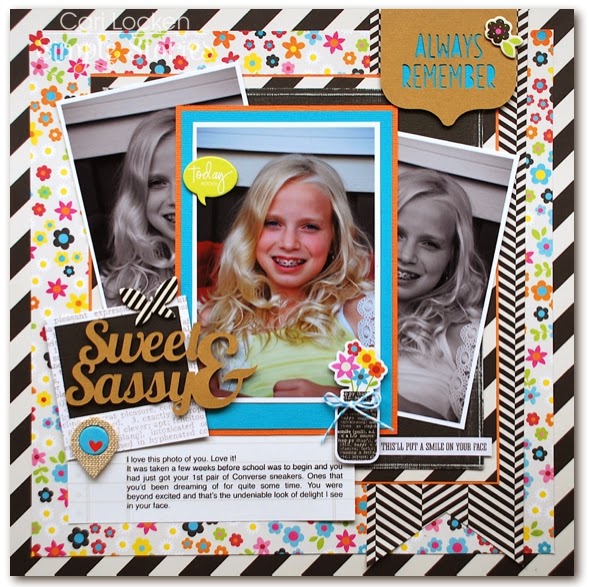
I decided that I would mat my photo with a few layers and then mat the papers on my layout as well.
So I began layering my photo. I first printed it with a white border and then matted it onto some turquoise card stock. I adhered the photo to the card stock first and then used the 1/4" measurement to trim around the photo.
I then matted the turquoise card stock onto some orange card stock using the 1/8" measurement.
I matted a piece of black card stock onto a piece of the diagonal striped patterned paper using the 1/4" measurement. I then matted that entire piece onto some orange card stock using the 1/16" measurement.
Adding layers is a great way to add dimension to your work. After matting your pictures you could also adhere them to your layout using foam squares for even more dimension. I decided to just adhere my main photo flat because I wanted to pop up my title instead.
Here's my finished layout.
Here's a few close-up shots.
Supplies Used:
Simple Stories (DIY Boutique collection: Patterned papers (5111, 5109, 5103); Stickers 5141, Chipboard Stickers 5128) DIY Office Card Foundations 5123, Icon Burlap Stickers 5150
Silhouette Cameo
Simple Stories Silhouette Cut Files ("always remember" and "sweet & sassy")
Perfect Paper Crafting (Perfect Layers)
Core'dinations Colorcore Cardstock (TH Kraft Core)
The Twinery (turquoise twine)
Xyron (tape runner)
Scrapbook Adhesives by 3L (foam squares)
Thanks for stopping by ... have a fabulous weekend!!


perfect layout, well designed and embellished
ReplyDelete