Showing posts with label queen and co.. Show all posts

Wednesday, September 11, 2013

Fall Canvas Tutorial

Hi there,

The fall weather seems to be creeping in - especially in the mornings. I can definitely feel the cooler air and crispness starting to arrive.
But that's ok because I enjoy this time of year. The changing colors of the leaves, sweater weather, pumpkin pie ... mmmm I can smell it already!

I'm glad you stopped by my blog today because I have a super easy & fun tutorial to share with you.
I love decorating for the changing seasons and always try to think of new ideas . This year I wanted to create a simple little canvas to place around my home - not sure where yet.


So I purchased an 8 x 10 canvas (you can find these at various craft stores and $ stores).

1. I set out my supplies.

  • I used some chipboard alpha & shapes that I had lying around (Basic Grey - very old collections)
  • canvas (from the craft store)
  • acrylic paints in various colors (sorry not sure because I'm an airhead & forgot to include the in the picture)
  • glitter & rhinestones (again ... forgot to include them)


2. Then I placed the shapes & letters on the canvas the way that I wanted.  (I played with this for a while until I got a look that I was happy with.)


3.  I then ran the chipboard letters through my Xyron 2.5" Create-a-Sticker machine.


 4.  Before adhering anything to the canvas I penciled a light line so that my letters would be straight when I adhered them to the canvas.  (don't worry about the pencil marks showing because they will get covered up by the paint and you won't see them at all.)


5. I then adhered the letters down spelling out my title.  (tip: I began adhering the letters at the end of the word that way I knew how much space I would need).


This is how my canvas looked with the title on it.


6.  The next step was to start painting it.  I began with a chocolate brown shade and painted a few coats. (1-3)

I used a brush to get in between the letters and fill the open spots with paint.

Here's what it looked like after a few shades of brown.  The foam brush was rather streaky but that was the look I was going for. (don't believe me do ya? )

7.  I then painted over the canvas again using a dark orange shade. I didn't paint it with a complete coat because I wanted the brown from beneath to show so I continued with the 'streaky' look.

8.  Once the paint was dried I used a turquoise colored paint and brushed over the canvas in a few spots (not all over as I just wanted 'hints' of the turquoise to show).


9.  Then I put the chipboard leaves through my Xyron 2.5" Create-a-Sticker.

Once the chipboard leaves had the adhesive on them I covered them with a browny-copper colored glitter and then another copper colored glitter that had blue in it. So pretty.   (the glitter is from Stampendous)

10. I then ran the glittered chipboard leaves through my Xyron 5" Create-a-Sticker and then adhered them to the canvas. I also added a few pearl gems.


I really like how it turned out.
(oh, and I adhered a small red painted chipboard heart too - using my Xyron 1.5" Create-a-Sticker)


Other: Chibpoard alpha & shapes (Basic Grey);  Glitter (Stampendous); pearl gems (Queen & Co.); paint (Plaid); canvas (craft store)


Well, thanks for stopping by today and hope you enjoyed my little tutorial!

Monday, August 19, 2013

"Home is Where YOU Are" Tutorial

Hi there,

Today I'd like to share a little tutorial with you. I used my Cricut Expression to create this cute little card and some awesome Xyron adhesives to put it all together.

Step #1:
After deciding what card design I was going to make I had to figure out what colors of cardstock I wanted. I wanted something cheerful, summery and inviting.


Step #2:
I then cut out all of the pieces using my Cricut Expression and the Wild Card 2 cartridge.


Step #3:  Embossing
I chose to emboss several of the cardstock pieces first before adhering them together.  (i.e door & body of the trailor) Then I sanded the embossed designs. I also sanded the edges of the 'window'.

Step #4: Adhering
I adhered the pieces together started from the bottom layer and working upwards using the Xyron Mega Runner.


I cut another door shape from red cardstock because I wanted the red to show through the heart shape of the door.

So I cut off the bottom section.


Put some adhesive (Xyron Permanent Adhesive Glue Stick) on the back of the grey coloured door. Then I adhered that overtop of the red cardstock.


 I then adhered the door to the front of the trailor (overtop of the orange cardstock door).


I sanded the edges of the orange circle (for the tire) then ran it through my 1.5" Xyron Create-a-Sticker  and then adhered that to the tire.


After adhering all the pieces of the trailer together I adhered all of it to the black card shape.

Step #5: Inside of Card (Sentiment)
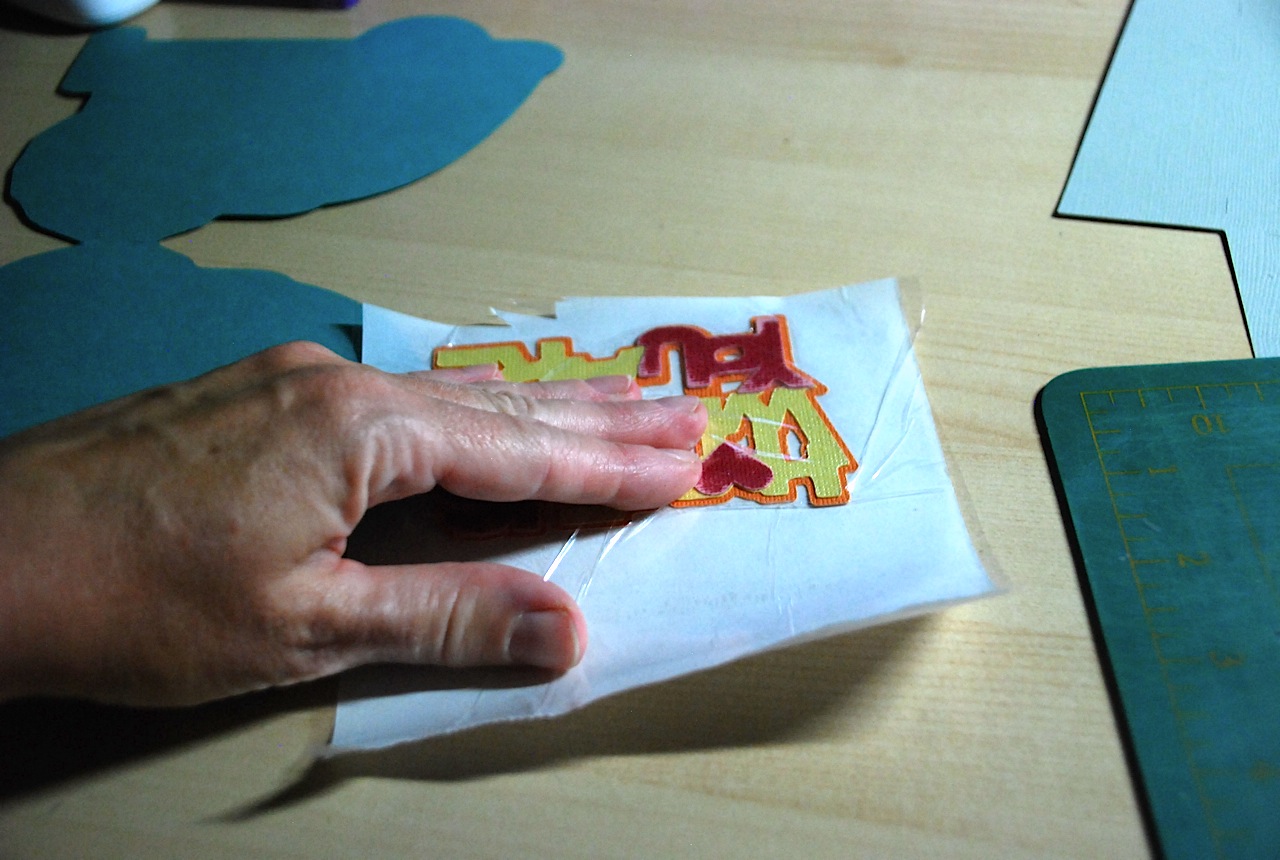
The inside of the card had 3 different pieces & colors. I adhered them together using my 5" Xyron Create-a-Sticker .

First the yellow layer was adhered to the orange background 'shadow' image.


Then I used my 1.5" Xyron Create-a-Sticker to adhere the red pieces to the yellow sentiment. (I also sanded the edges of the red cardstock pieces ... TIP: do this before you add the adhesive)


I then ran the entire sentiment piece through my 5" Xyron Create-a-Sticker


TIP: If you aren't familiar with using this machine I must tell you that's it's so much fun. After you run your design through the rollers you must then rub on the image. This helps to create the stickiness on the back of your design.

You then simply pull off the liner (top layer) and carefully peel your sticker off the white backing and adhere to your project.


Step #6: Envelope
After cutting out the pieces for the envelope (3 in total) I embossed the rectangle turquoise piece and sanded it.

I used the Xyron Glue Stick to adhere the liner to the inside of the envelope and then adhered the flaps of the envelope as well.


My handy little 1.5" Xyron Create-a-Sticker (one of my favorite tools) was used to adhere the heart shape to the back flap of the envelope.


Here's just a few more pictures of the card & envelope set.

Isn't the front of that envelope just the cutest? I probably cut have dressed it up a bit more ... but I'm a 'simple' kind of gal. ;)

Supplies used:
- Core'dinations Colorcore Cardstock (Core Essentials, Gemstones and Black Magic collections, Sand It Gadget and Dust Buddy cloth)
- Queen & Co (pearl rhinestone)
- Cricut Expression and Wild Card 2 Cartridge
- Cuttlebug machine and embossing folders


THE FINISHED PROJECT:
And here's the final version of my card. (I realized that it was missing a 'little' something ... so I added a pearl to the door for the door handle.


 Thanks for stopping by.

Monday, September 20, 2010

Coredinations and myStampBOX Blog Swap

So have you checked out the blog swap yet?? I mentioned it below earlier on today.

We're having a blog swap between these 2 companies. The design team members have created some amazing projects and you can check that all out on the company blogs. Make sure to comment on their blogs for your chance to win some goodies!


Here's my creations. Of course, you already know how much I love Core'dinations. Their cardstock is my favorite and is SO much fun to use!!!
Plus I loved using the set of stamps that I received for the swap. These are quality stamps! The images come out so clean and crisp and I really like that.

Thanks Core' & mSB for an awesome swap!!!

I'll leave you with my projects.

Supplies used: Core'dinations cardstock (Jenni Bowling collection), myStampBOX stamps (Birthday Balloons), ink (Colorbox), Queen & Co. felt, May Arts ribbon


Supplies used: Core'dinations cardstock, myStamp Box stamps (Rought Copy alpha), Queen & Co felt flowers, pearls & rhinestones, EK Success punches, Making Memories (Alpha stickers), BoBunny (rub-on image)