Showing posts with label embossing. Show all posts

Thursday, September 05, 2013

Favourites!

Today's post is about some of my favourite things.

My 1st favourite has to do with scrapbooking ... and that is EMBOSSING.  (I'll get into detail on that in just a minute)

My next favourite is my sweet girl, Kailyn. (and I'll talk a bit more about her at the end ... even though this post is all about her anyways! )

Ok back to my 1st favourite, embossing.
I love embossing cardstock.  I'm not talking about stamping with ink and sprinkling embossing powder all over and then using the heat gun to emboss.
I'm talking about putting cardstock into indented folders, running them through an embossing machine and enjoying the raised beauty that you've created on the cardstock.

I've been working for Core'dinations Cardstock for several years now and my love for them grows stronger every day.  The reason why is that I never get tired of using this cardstock.  That's why I love embossing with it.  Each (and every) time I emboss a piece of cardstock, then sand the design it comes to life!! Seriously. It really does.  (I know you think I'm nuts right now ... but if you have used this cardstock before you know what I'm talking about. And if you're the one laughing at me because you have no clue what I'm talking about ... well then, you'd better get yourself some Core' cardstock to play with because you are seriously missing out!!!)

So ... one of my assignments for Xyron this month was to share a favourite technique of mine. If you hop on over to the Xyron blog today you'll see a few other favourites from some of the other DT members) I've already shared with you what is and now I'd like to share with you a layout that I created ... all about embossing.

I used some Core' TH Shattered cardstock  as the base of my layout. I also used some TH Kraft collection and Vintage cardstock.


I love all the varieties of embossing folders that are on the market and sometimes it's hard to chose which ones to use on a project.


You'll notice that the turquoise cardstock I used a Fiskars punch that actually punched the 'bracket' shape and embossed at the same time! Love that!


Scored lines all around the edges. Sanded them. Then punched out some photo corners from the Core Essentials (same color), sanded those and then adhered them in each corner using my Xyron 1.5" Create-a-Sticker.


For the title letters 'daughter' I cut that out with my Silhouette and then drew some white highlighting markers on the cardstock using a white gel pen. 


Supplies used: Xyron (1.5" Create-a-Sticker, 5" Create-a-Sticker, Mega Runener); Core'dinations Colorcore Cardstock (TH Kraft, TH Shattered, Essentials, Vintage); Simple Stories (alpha stickers, camera, arrows, tabs stickers); Silhouette ("daughter' and 'captured' arrows), Cuttlebug embossing folders and Cuttlebug machine.

*********

Now my other favourite as I mentioned above ...  is my daughter.
Today is her 13th birthday!! Wow!!


It really does feel like yesterday when she was a baby. Needing me for everything.  Not the same today, that's for sure.
She is growing up quickly (although not too quickly and I'm thankful for that).  I'm enjoying watching her grow up. This is actually her 2nd day of Gr. 8 and high school so life will have a few major changes this year for her. But she's excited about it and looking forward to it.  Again, .. another blessing.

We're looking forward to celebrating her birthday today!
Happy Birthday sweet girl!

Monday, August 19, 2013

"Home is Where YOU Are" Tutorial

Hi there,

Today I'd like to share a little tutorial with you. I used my Cricut Expression to create this cute little card and some awesome Xyron adhesives to put it all together.

Step #1:
After deciding what card design I was going to make I had to figure out what colors of cardstock I wanted. I wanted something cheerful, summery and inviting.


Step #2:
I then cut out all of the pieces using my Cricut Expression and the Wild Card 2 cartridge.


Step #3:  Embossing
I chose to emboss several of the cardstock pieces first before adhering them together.  (i.e door & body of the trailor) Then I sanded the embossed designs. I also sanded the edges of the 'window'.

Step #4: Adhering
I adhered the pieces together started from the bottom layer and working upwards using the Xyron Mega Runner.


I cut another door shape from red cardstock because I wanted the red to show through the heart shape of the door.

So I cut off the bottom section.


Put some adhesive (Xyron Permanent Adhesive Glue Stick) on the back of the grey coloured door. Then I adhered that overtop of the red cardstock.


 I then adhered the door to the front of the trailor (overtop of the orange cardstock door).


I sanded the edges of the orange circle (for the tire) then ran it through my 1.5" Xyron Create-a-Sticker  and then adhered that to the tire.


After adhering all the pieces of the trailer together I adhered all of it to the black card shape.

Step #5: Inside of Card (Sentiment)
The inside of the card had 3 different pieces & colors. I adhered them together using my 5" Xyron Create-a-Sticker .

First the yellow layer was adhered to the orange background 'shadow' image.


Then I used my 1.5" Xyron Create-a-Sticker to adhere the red pieces to the yellow sentiment. (I also sanded the edges of the red cardstock pieces ... TIP: do this before you add the adhesive)


I then ran the entire sentiment piece through my 5" Xyron Create-a-Sticker


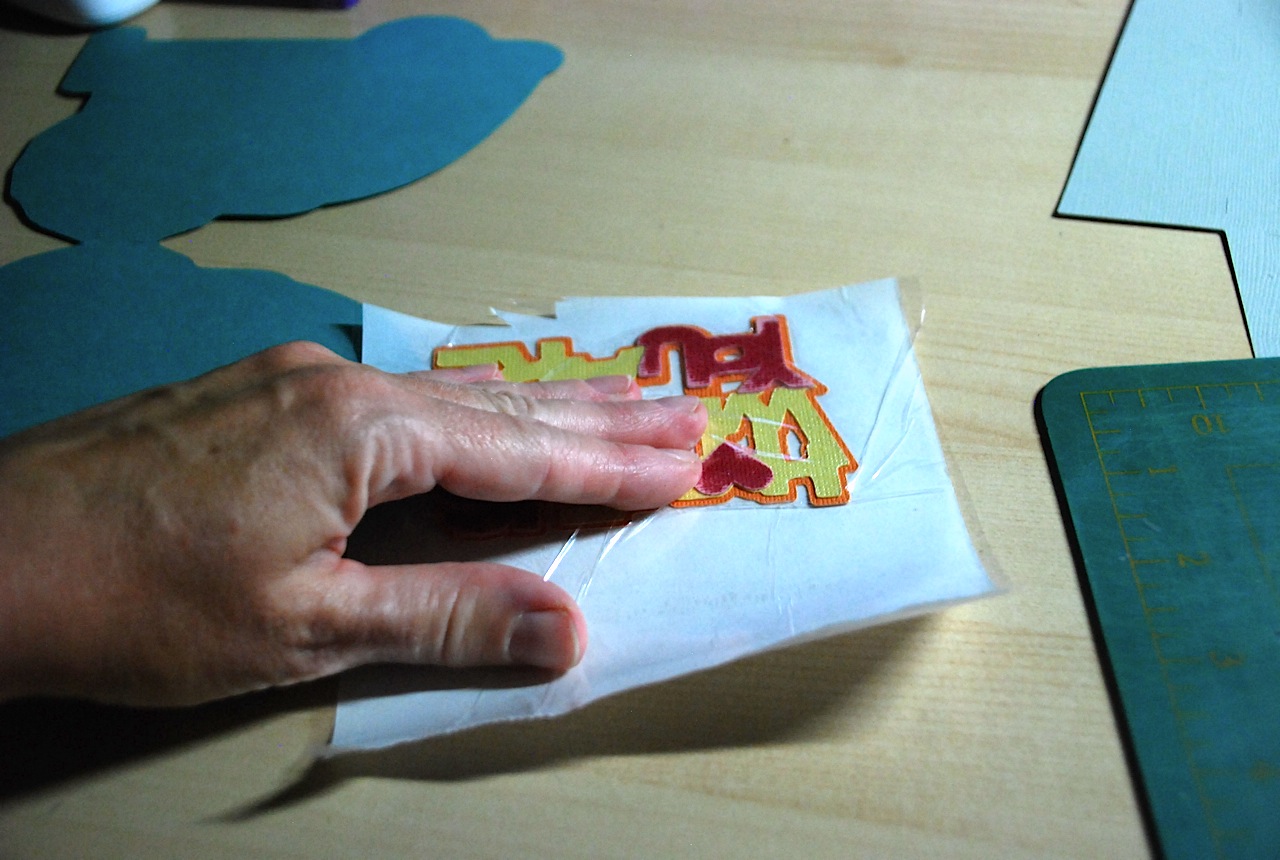
TIP: If you aren't familiar with using this machine I must tell you that's it's so much fun. After you run your design through the rollers you must then rub on the image. This helps to create the stickiness on the back of your design.

You then simply pull off the liner (top layer) and carefully peel your sticker off the white backing and adhere to your project.


Step #6: Envelope
After cutting out the pieces for the envelope (3 in total) I embossed the rectangle turquoise piece and sanded it.

I used the Xyron Glue Stick to adhere the liner to the inside of the envelope and then adhered the flaps of the envelope as well.


My handy little 1.5" Xyron Create-a-Sticker (one of my favorite tools) was used to adhere the heart shape to the back flap of the envelope.


Here's just a few more pictures of the card & envelope set.

Isn't the front of that envelope just the cutest? I probably cut have dressed it up a bit more ... but I'm a 'simple' kind of gal. ;)

Supplies used:
- Core'dinations Colorcore Cardstock (Core Essentials, Gemstones and Black Magic collections, Sand It Gadget and Dust Buddy cloth)
- Queen & Co (pearl rhinestone)
- Cricut Expression and Wild Card 2 Cartridge
- Cuttlebug machine and embossing folders


THE FINISHED PROJECT:
And here's the final version of my card. (I realized that it was missing a 'little' something ... so I added a pearl to the door for the door handle.


 Thanks for stopping by.

Tuesday, July 16, 2013

CHA sneak and Simple Stories: Smarty Pants

Hi there!

Simple Stories is releasing some awesome collections this summer at CHA! I aboslutely love them all!!!! So many fun patterns, embellishments and goodies in each collection.

Today I'm so excited to be sharing with you the new SMARTY PANTS release. I have always had a love for getting ready for school and buying school supplies. So this collection with its' fun designs & cheerful bright colors brought all those memories back to me.


Here's a look at some of the great stuff in this new release.


Here's a layout that I created with this collection.
The picture is from September 2012 and my children's 1st day back to school.  They look a wee bit sleepy as it was hard getting up early that first day.

Supplies: Simple Stories (Smarty Pants collection: patterned papers, chipboard, Expression Cardstock Stickers,  Fundamental Cardstock Stickers,); Core'dinations Colorcore Cardstock, Cuttlebug, Cuttlebug embossing folder, vellum, corner rounder punch, Adhesives (Scrapbook Adhesives by 3L)


There's more sneaks revealed on the Simple Stories blog so make sure to check it out. 
PLUS you can have a chance to win this collection!!
Just head on over to the blog post HERE and leave a comment to let them know which is your favourite product from this collection.